Burn a BIN without a CUE using NERO
You've downloaded a *.BIN file, but there was no *.CUE file associated and you still want to burn the *.BIN file using Nero
Your options are:
1) Create yourself a *.CUE
2) Convert the *.BIN to an *.ISO
3) OR use Nero to burn without the *.CUE file!!!
Yes, that's possible... just follow these steps and you will be sorted. No need for *.CUE files anymore
Ok, here we go...
1) Start Nero
2) File -> Burn Image
3) Browse to the *.BIN file that you want to burn and open it
4) A window saying "Foreign Image Settings" will open
5) Check the settings. They should be as followed:
* Type of image: leave it to Data Mode 1
* Select the Raw Data check box
Note ->> The block size will change automatically from 2048 to 2352
* Leave Image Header and Image Trailer unchanged and set to 0
* Leave "Scrambled" and "Swapped" check boxes unchecked
6) Click on burn!
7) Enjoy
This tut was for Nero 5.x.x.x, I was told that "Burn Image" is under "recorder" in Nero 6. The rest of the steps should be the same...
Sunday 14 February 2016
BIOS Update Procedure
BIOS Update Procedure
All latest Motherboards today, 486/ Pentium / Pentium Pro etc.,ensure that upgrades are easily obtained by incorporating the system BIOS in a FLASH Memory component. With FLASH BIOS, there is no need to replace an EPROM component. Once downloaded, the upgrade utility fits on a floppy disc allowing the user to save, verify and update the system BIOS. A hard drive or a network drive can also be used to run the newer upgrade utilities. However, memory managers can not be installed while upgrading.
Most pre-Pentium motherboards do not have a Flash BIOS. The following instructions therefore do not apply to these boards. If your motherboard does not have a Flash BIOS (EEPROM) you will need to use an EPROM programmer to re-program the BIOS chip. See your dealer for more information about this.
Please read the following instructions in full before starting a Flash BIOS upgrade:
A. Create a Bootable Floppy (in DOS)
•With a non-formatted disk, type the following:
format a:/s
•If using a formatted disk, type:
sys a:
This procedure will ensure a clean boot when you are flashing the new BIOS.
B. Download the BIOS file
•Download the correct BIOS file by clicking on the file name of the BIOS file you wish to download.
•Save the BIOS file and the Flash Utility file in the boot disk you have created. Unzip the BIOS file and the flash utility file. If you don't have an "unzip" utility, download the WinZip for Windows 95 shareware/ evaluation copy for that one time use from _www.winzip.com or _www.pkware.com. Most CD ROMs found in computer magazines, have a shareware version of WinZip on them.
•You should have extracted two files:
Flash BIOS utility eg: flash7265.exe (for example)
BIOS eg: 6152J900.bin (example)
Use the latest flash utility available unless otherwise specified (either on the BIOS update page or in the archive file). This information is usually provided.
C. Upgrade the System BIOS
During boot up, write down the old BIOS version because you will need to use it for the BIOS backup file name.
Place the bootable floppy disk containing the BIOS file and the Flash Utility in drive a, and reboot the system in MS-DOS, preferably Version 6.22
•At the A:> prompt, type the corresponding Flash BIOS utility and the BIOS file with its extension.
For example:
flash625 615j900.bin
•From the Flash Memory Writer menu, select "Y" to "Do you want to save BIOS?" if you want to save (back up) your current BIOS (strongly recommended), then type the name of your current BIOS and its extension after FILE NAME TO SAVE: eg: a:\613J900.bin
Alternatively select "N" if you don't want to save your current BIOS. Beware, though, that you won't be able to recover from a possible failure.
•Select "Y" to "Are you sure to program?"
•Wait until it displays "Message: Power Off or Reset the system"
Once the BIOS has been successfully loaded, remove the floppy disk and reboot the system. If you write to BIOS but cannot complete the procedure, do not switch off, because the computer will not be able to boo, and you will not be given another chance to flash. In this case leave your system on until you resolve the problem (flashing BIOS with old file is a possible solution, provided you've made a backup before)
Make sure the new BIOS version has been loaded properly by taking note of the BIOS identifier as the system is rebooting.
For AMI BIOS
Once the BIOS has been successfully loaded, remove the floppy disk and reboot the system holding the "END" key prior to power on until you enter CMOS setup. If you do not do this the first time booting up after upgrading the BIOS, the system will hang.
BIOS Update Tips
note:
1.Make sure never to turn off or reset your computer during the flash process. This will corrupt the BIOS data. We also recommend that you make a copy of your current BIOS on the bootable floppy so you can reflash it if you need to. (This option is not available when flashing an AMI BIOS).
2. If you have problems installing your new BIOS please check the following:
Have you done a clean boot?
In other words, did you follow the above procedure for making a bootable floppy? This ensures that when booting from "A" there are no device drivers on the diskette. Failing to do a clean boot is the most common cause for getting a "Memory Insufficient" error message when attempting to flash a BIOS.
If you have not used a bootable floppy, insure a clean boot either by
a) pressing F5 during bootup
b) by removing all device drivers on the CONFIG.SYS including the HIMEM.SYS. Do this by using the EDIT command.
Have you booted up under DOS?
Booting in Windows is another common cause for getting a "Memory Insufficient" error message when attempting to flash a BIOS. Make sure to boot up to DOS with a minimum set of drivers. Important: Booting in DOS does not mean selecting "Restart computer in MS-DOS Mode" from Windows98/95 shutdown menu or going to Prompt mode in WindowsNT, but rather following the above procedure (format a: /s and rebooting from a:\).
Have you entered the full file name of the flash utility and the BIOS plus its extension?
Do not forget that often you will need to add a drive letter (a:\) before flashing the BIOS. Example: when asked for file name of new BIOS file which is on your floppy disk, in case you're working from c:\ your will need to type a:\615j900.bin, rather than 615j900.bin only.
Saturday 13 February 2016
Xp Folder View Does Not Stay To You're Setting., Grab your registry editor and join in
Xp Folder View Does Not Stay To You're Setting., Grab your registry editor and join in
Why Doesn't Windows Remember My Folder View Settings?
If you've changed the view settings for a folder, but Windows "forgets" the settings when you open the folder again, or if Windows doesn't seem to remember the size or position of your folder window when you reopen it, this could be caused by the default limitation on storing view settings data in the registry; by default Windows only remembers settings for a total of 200 local folders and 200 network folders.
To work around this problem, create a BagMRU Size DWORD value in both of the following registry keys, and then set the value data for both values to the number of folders that you want Windows to remember the settings for. For example, for Windows to remember the settings for 5000 local folders and 5000 network folders, set both values to 5000.
Here is how:
Follow these steps, and then quit Registry Editor:
1. Click Start, click Run, type regedit, and then click OK.
2. Locate and then click the following key in the registry:
HKEY_CURRENT_USER\Software\Microsoft\Windows\Shell
3. On the Edit menu, point to New, and then click DWORD Value.
4. Type BagMRU Size, and then press ENTER.
5. On the Edit menu, click Modify.
6. Type 5000, and then click OK.
AND:
1. Locate and then click the following key in the registry:
HKEY_CURRENT_USER\Software\Microsoft\Windows\ShellNoRoam
2. On the Edit menu, point to New, and then click DWORD Value.
3. Type BagMRU Size, and then press ENTER.
4. On the Edit menu, click Modify.
5. Type 5000, and then click OK.
Note:
When you use roaming user profiles, registry information is copied to a server when you log off and copied to your local computer when you log on. Therefore, you may have performance issues if you increase the BagMRU Size values for roaming user profiles.
XP Auto install
Hello friends
May be this might be useful. I install 98 with backup/restore utility.
My way of auto installation of XP.
Then on second partition or the same partition XP without pagefile.sys.
Then i get a dual boot. So after booting into XP, Install all ur fav progies
n games. Test each of them, to make sure they work... etc etc... all
ur drivers also. Tweak ur xp.
make sure u unhide all files relates to win xp dir and progra files.
Then boot into 98 > goto backup utility of 98.
Select the folders used by XP, eg
my documents and settings
winxp (or windows- what ever name u gave to windows dir)
check all files in the root
program files folder
and like this all folders and files used by xp.
then start the backup process.
make sure u have ~ > 3gb of free space on the disk / partition
u r planning to save the image file.
Then when ur XP crashes or U crash it ... lol
then just boot into 98, goto restore option,
and click ok. Over write old files or new ones as u like.
It takes ~20min to install
Windows Xp including
Office Xp
Interdev
.net framework
winzip
winrar
tweaks
easy cleaner
adobe
gif animator
acdess 6
service pack1 , and now service pack 2b
lan settings
mcafee antivirus
zone alarm
cute ftp3 pro
Easy CD-DA Extractor 7
Eraser
Ahead
Links Organizer
Bulk Rename Utility
BitStrike Software
Mozilla Firefox
Microsoft Visual Studio
Opera
Onlinetimer
Nokia
Ulead Systems
UltraISO
Virtual CD v4
SlimBrowser
Yahoo!
Msn
Webroot
Spamihilator
inetpub
U can exclude any folder, u think is not needed at that time for reinstallation.
The whole task id completed in 20 minutes ... in the mean while
I make a nice cup of tea for myself and wait for XP to start
PS: dont forget to include boot.ini file.
Hope it will help.
Xp Tweaking
Win XP Tweaks
-----------
STARTUP
-----------
Windows Prefetcher
******************
[HKEY_LOCAL_MACHINE \ SYSTEM \ CurrentControlSet \ Control \ Session Manager \ Memory Management \ PrefetchParameters]
Under this key there is a setting called EnablePrefetcher, the default setting of which is 3. Increasing this number to 5 gives the prefetcher system more system resources to prefetch application data for faster load times. Depending on the number of boot processes you run on your computer, you may get benefits from settings up to 9. However, I do not have any substantive research data on settings above 5 so I cannot verify the benefits of a higher setting. This setting also may effect the loading times of your most frequently launched applications. This setting will not take effect until after you reboot your system.
Master File Table Zone Reservation
**********************************
[HKEY_LOCAL_MACHINE \ SYSTEM \ CurrentControlSet \ Control \ FileSystem]
Under this key there is a setting called NtfsMftZoneReservation, the default setting of which is 1. The range of this value is from 1 to 4. The default setting reserves one-eighth of the volume for the MFT. A setting of 2 reserves one-quarter of the volume for the MFT. A setting of 3 for NtfsMftZoneReservation reserves three-eighths of the volume for the MFT and setting it to 4 reserves half of the volume for the MFT. Most users will never exceed one-quarter of the volume. I recommend a setting of 2 for most users. This allows for a "moderate number of files" commensurate with the number of small files included in most computer games and applications. Reboot after applying this tweak.
Optimize Boot Files
*******************
[HKEY_LOCAL_MACHINE \ SOFTWARE \ Microsoft \ Dfrg \ BootOptimizeFunction]
Under this key is a text value named Enable. A value of Y for this setting enables the boot files defragmenter. This setting defragments the boot files and may move the boot files to the beginning (fastest) part of the partition, but that last statement is unverified. Reboot after applying this tweak.
Optimizing Startup Programs [msconfig]
**************************************
MSConfig, similar to the application included in Win9x of the same name, allows the user to fine tune the applications that are launched at startup without forcing the user to delve deep into the registry. To disable some of the applications launched, load msconfig.exe from the run command line, and go to the Startup tab. From there, un-ticking the checkbox next to a startup item will stop it from launching. There are a few application that you will never want to disable (ctfmon comes to mind), but for the most part the best settings vary greatly from system to system.
As a good rule of thumb, though, it is unlikely that you will want to disable anything in the Windows directory (unless it's a third-party program that was incorrectly installed into the Windows directory), nor will you want to disable anything directly relating to your system hardware. The only exception to this is when you are dealing with software, which does not give you any added benefits (some OEM dealers load your system up with software you do not need). The nice part of msconfig is that it does not delete any of the settings, it simply disables them, and so you can go back and restart a startup application if you find that you need it. This optimization won't take effect until after a reboot.
Bootvis Application
*******************
The program was designed by Microsoft to enable Windows XP to cold boot in 30 seconds, return from hibernation in 20 seconds, and return from standby in 10 seconds. Bootvis has two extremely useful features. First, it can be used to optimize the boot process on your computer automatically. Second, it can be used to analyze the boot process for specific subsystems that are having difficulty loading. The first process specifically targets the prefetching subsystem, as well as the layout of boot files on the disk. When both of these systems are optimized, it can result in a significant reduction in the time it takes for the computer to boot.
Before attempting to use Bootvis to analyze or optimize the boot performance of your system, make sure that the task scheduler service has been enabled – the program requires the service to run properly. Also, close all open programs as well – using the software requires a reboot.
To use the software to optimize your system startup, first start with a full analysis of a fresh boot. Start Bootvis, go to the Tools menu, and select next boot. Set the Trace Repetition Settings to 2 repetitions, Start at 1, and Reboot automatically. Then set the trace into motion. The system will fully reboot twice, and then reopen bootvis and open the second trace file (should have _2 in the name). Analyze the graphs and make any changes that you think are necessary (this is a great tool for determining which startup programs you want to kill using msconfig). Once you have made your optimizations go to the Trace menu, and select the Optimize System item. This will cause the system to reboot and will then make some changes to the file structure on the hard drive (this includes a defragmentation of boot files and a shifting of their location to the fastest portion of the hard disk, as well as some other optimizations). After this is done, once again run a Trace analysis as above, except change the starting number to 3. Once the system has rebooted both times, compare the charts from the second trace to the charts for the fourth trace to show you the time improvement of the system's boot up.
The standard defragmenter included with Windows XP will not undo the boot optimizations performed by this application.
-----------------------------------
General Performance Tweaks
-----------------------------------
IRQ Priority Tweak
******************
[HKEY_LOCAL_MACHINE \ System \ CurrentControlSet \ Control \ PriorityControl]
You will need to create a new DWORD: IRQ#Priority (where # is the number of the IRQ you want to prioritize) and give it a setting of 1. This setting gives the requisite IRQ channel priority over the other IRQs on a software level. This can be extremely important for functions and hardware subsystems that need real-time access to other parts of the system. There are several different subsystems that might benefit from this tweak. Generally, I recommend giving either the System CMOS or the video card priority. The System CMOS generally has an IRQ setting of 8, and giving it priority enhances the I/O performance of the system. Giving priority to the video card can increase frame rates and make AGP more effective.
You can give several IRQs priority, but I am not entirely certain how the system interacts when several IRQs are given priority – it may cause random instabilities in the system, although it is more likely that there's a parsing system built into Windows XP to handle such an occurrence. Either way, I would not recommend it.
QoS tweak
*********
QoS (Quality of Service) is a networking subsystem which is supposed to insure that the network runs properly. The problem with the system is that it eats up 20% of the total bandwidth of any networking service on the computer (including your internet connection). If you are running XP Professional, you can disable the bandwidth quota reserved for the system using the Group Policy Editor [gpedit.msc].
You can run the group policy editor from the Run command line. To find the setting, expand "Local Computer Policy" and go to "Administrative Templates" under "Computer Configuration." Then find the "Network" branch and select "QoS Packet Scheduler." In the right hand box, double click on the "Limit Reservable Bandwidth." From within the Settings tab, enable the setting and then go into the "Bandwidth Limit %" and set it to 0%. The reason for this is that if you disable this setting, the computer defaults to 20%. This is true even when you aren't using QoS.
Free Idle Tasks Tweak
*********************
This tweak will free up processing time from any idle processes and allow it to be used by the foreground application. It is useful particularly if you are running a game or other 3D application. Create a new shortcut to "Rundll32.exe advapi32.dll,ProcessIdleTasks" and place it on your desktop. Double-click on it anytime you need all of your processing power, before opening the application.
Windows Indexing Services
Windows Indexing Services creates a searchable database that makes system searches for words and files progress much faster – however, it takes an enormous amount of hard drive space as well as a significant amount of extra CPU cycles to maintain the system. Most users will want to disable this service to release the resources for use by the system. To turn off indexing, open My Computer and right click on the drive on which you wish to disable the Indexing Service. Enter the drive's properties and under the general tab, untick the box for "Allow the Indexing Service to index this disk for fast file searching."
Priority Tweak
**************
[HKEY_LOCAL_MACHINE \ SYSTEM \ CurrentControlSet \ Control \ PriorityControl]
This setting effectively runs each instance of an application in its own process for significantly faster application performance and greater stability. This is extremely useful for users with stability problems, as it can isolate specific instances of a program so as not to bring down the entire application. And, it is particularly useful for users of Internet Explorer, for if a rogue web page crashes your browser window, it does not bring the other browser windows down with it. It has a similar effect on any software package where multiple instances might be running at once, such as Microsoft Word. The only problem is that this takes up significantly more memory, because such instances of a program cannot share information that is in active memory (many DLLs and such will have to be loaded into memory multiple times). Because of this, it is not recommended for anyone with less than 512 MB of RAM, unless they are running beta software (or have some other reason for needing the added stability).
There are two parts to this tweak. First is to optimize XP's priority control for the processes. Browse to HKEY_LOCAL_MACHINE \ SYSTEM \ CurrentControlSet \ Control \ PriorityControl and set the "Win32PrioritySeparation" DWORD to 38. Next, go into My Computer and under Tools, open the Folder Options menu. Select the View tab and check the "Launch folder windows in separate process" box. This setting actually forces each window into its own memory tread and gives it a separate process priority.
Powertweak application
**********************
xxx.powertweak.com
Powertweak is an application, which acts much like a driver for our chipsets. It optimizes the communication between the chipset and the CPU, and unlocks several "hidden" features of the chipset that can increase the speed of the system. Specifically, it tweaks the internal registers of the chipset and processor that the BIOS does not for better communication performance between subsystems. Supported CPUs and chipsets can see a significant increase in I/O bandwidth, increasing the speed of the entire system. Currently the application supports most popular CPUs and chipsets, although you will need to check the website for your specific processor/chipset combo – the programmer is working on integrating even more chipsets and CPUs into the software.
Offload Network Task Processing onto the Network Card
*****************************************************
[HKEY_LOCAL_MACHINE \ SYSTEM \ CurrentControlSet \ Services \ Tcpip \ Parameters]
Many newer network cards have the ability of taking some of the network processing load off of the processor and performing it right on the card (much like Hardware T&L on most new video cards). This can significantly lower the CPU processes needed to maintain a network connection, freeing up that processor time for other tasks. This does not work on all cards, and it can cause network connectivity problems on systems where the service is enabled but unsupported, so please check with your NIC manufacturer prior to enabling this tweak. Find the DWORD "DisableTaskOffload" and set the value to 0 (the default value is 1). If the key is not already available, create it.
Force XP to Unload DLLs
***********************
[HKEY_LOCAL_MACHINE \ SOFTWARE \ Microsoft \ Windows \ CurrentVersion \ Explorer]
"AlwaysUnloadDLL"=dword:00000001
XP has a bad habit of keeping dynamic link libraries that are no longer in use resident in memory. Not only do the DLLs use up precious memory space, but they also tend to cause stability problems in some systems. To force XP to unload any DLLs in memory when the application that called them is no longer in memory, browse to HKEY_LOCAL_MACHINE \ SOFTWARE \ Microsoft \ Windows \ CurrentVersion \ Explorer and find the DWORD "AlwaysUnloadDLL". You may need to create this key. Set the value to 1 to force the operating system to unload DLLs.
Give 16-bit apps their own separate processes
*********************************************
[HKEY_LOCAL_MACHINE \ SYSTEM \ CurrentControlSet \ Control \ WOW]
"DefaultSeparateVDM"="Yes"
By default, Windows XP will only open one 16-bit process and cram all 16-bit apps running on the system at a given time into that process. This simulates how MS-DOS based systems viewed systems and is necessary for some older applications that run together and share resources. However, most 16-bit applications work perfectly well by themselves and would benefit from the added performance and stability of their own dedicated resources. To force Windows XP to give each 16-bit application it's own resources, browse to HKEY_LOCAL_MACHINE \ SYSTEM \ CurrentControlSet \ Control \ WOW and find the String "DefaultSeparateVDM". If it is not there, you may need to create it. Set the value of this to Yes to give each 16-bit application its own process, and No to have the 16-bit application all run in the same memory space.
Disable User Tracking
*********************
[HKEY_CURRENT_USER \ Software \ Microsoft \ Windows \ CurrentVersion \ Policies \ Explorer]
"NoInstrumentation"=dword:00000001
The user tracking system built into Windows XP is useless to 99% of users (there are very few uses for the information collected other than for a very nosy system admin), and it uses up precious resources to boot, so it makes sense to disable this "feature" of Windows XP. To do so, browse to HKEY_CURRENT_USER \ Software \ Microsoft \ Windows \ CurrentVersion \ Policies \ Explorer and find the DWORD "NoInstrumentation". You may need to create this key if it is not there. The default setting is 0, but setting it to 1 will disable most of the user tracking features of the system.
Thumbnail Cache
***************
[HKEY_CURRENT_USER \ Software \ Microsoft \ Windows \ CurrentVersion \ Explorer \ Advanced]
"DisableThumbnailCache"=dword:00000001
Windows XP has a neat feature for graphic and video files that creates a "thumbnail" of the image or first frame of the video and makes it into an oversized icon for the file. There are two ways that Explorer can do this, it can create them fresh each time you access the folder or it can load them from a thumbnail cache. The thumbnail caches on systems with a large number of image and video files can become staggeringly large. To disable the Thumbnail Cache, browse to HKEY_CURRENT_USER \ Software \ Microsoft \ Windows \ CurrentVersion \ Explorer \ Advanced and find the DWORD "DisableThumbnailCache". You may need to create this key. A setting of 1 is recommended for systems where the number of graphic and video files is large, and a setting of 0 is recommended for systems not concerned about hard drive space, as loading the files from the cache is significantly quicker than creating them from scratch each time a folder is accessed.
-----------
STARTUP
-----------
Windows Prefetcher
******************
[HKEY_LOCAL_MACHINE \ SYSTEM \ CurrentControlSet \ Control \ Session Manager \ Memory Management \ PrefetchParameters]
Under this key there is a setting called EnablePrefetcher, the default setting of which is 3. Increasing this number to 5 gives the prefetcher system more system resources to prefetch application data for faster load times. Depending on the number of boot processes you run on your computer, you may get benefits from settings up to 9. However, I do not have any substantive research data on settings above 5 so I cannot verify the benefits of a higher setting. This setting also may effect the loading times of your most frequently launched applications. This setting will not take effect until after you reboot your system.
Master File Table Zone Reservation
**********************************
[HKEY_LOCAL_MACHINE \ SYSTEM \ CurrentControlSet \ Control \ FileSystem]
Under this key there is a setting called NtfsMftZoneReservation, the default setting of which is 1. The range of this value is from 1 to 4. The default setting reserves one-eighth of the volume for the MFT. A setting of 2 reserves one-quarter of the volume for the MFT. A setting of 3 for NtfsMftZoneReservation reserves three-eighths of the volume for the MFT and setting it to 4 reserves half of the volume for the MFT. Most users will never exceed one-quarter of the volume. I recommend a setting of 2 for most users. This allows for a "moderate number of files" commensurate with the number of small files included in most computer games and applications. Reboot after applying this tweak.
Optimize Boot Files
*******************
[HKEY_LOCAL_MACHINE \ SOFTWARE \ Microsoft \ Dfrg \ BootOptimizeFunction]
Under this key is a text value named Enable. A value of Y for this setting enables the boot files defragmenter. This setting defragments the boot files and may move the boot files to the beginning (fastest) part of the partition, but that last statement is unverified. Reboot after applying this tweak.
Optimizing Startup Programs [msconfig]
**************************************
MSConfig, similar to the application included in Win9x of the same name, allows the user to fine tune the applications that are launched at startup without forcing the user to delve deep into the registry. To disable some of the applications launched, load msconfig.exe from the run command line, and go to the Startup tab. From there, un-ticking the checkbox next to a startup item will stop it from launching. There are a few application that you will never want to disable (ctfmon comes to mind), but for the most part the best settings vary greatly from system to system.
As a good rule of thumb, though, it is unlikely that you will want to disable anything in the Windows directory (unless it's a third-party program that was incorrectly installed into the Windows directory), nor will you want to disable anything directly relating to your system hardware. The only exception to this is when you are dealing with software, which does not give you any added benefits (some OEM dealers load your system up with software you do not need). The nice part of msconfig is that it does not delete any of the settings, it simply disables them, and so you can go back and restart a startup application if you find that you need it. This optimization won't take effect until after a reboot.
Bootvis Application
*******************
The program was designed by Microsoft to enable Windows XP to cold boot in 30 seconds, return from hibernation in 20 seconds, and return from standby in 10 seconds. Bootvis has two extremely useful features. First, it can be used to optimize the boot process on your computer automatically. Second, it can be used to analyze the boot process for specific subsystems that are having difficulty loading. The first process specifically targets the prefetching subsystem, as well as the layout of boot files on the disk. When both of these systems are optimized, it can result in a significant reduction in the time it takes for the computer to boot.
Before attempting to use Bootvis to analyze or optimize the boot performance of your system, make sure that the task scheduler service has been enabled – the program requires the service to run properly. Also, close all open programs as well – using the software requires a reboot.
To use the software to optimize your system startup, first start with a full analysis of a fresh boot. Start Bootvis, go to the Tools menu, and select next boot. Set the Trace Repetition Settings to 2 repetitions, Start at 1, and Reboot automatically. Then set the trace into motion. The system will fully reboot twice, and then reopen bootvis and open the second trace file (should have _2 in the name). Analyze the graphs and make any changes that you think are necessary (this is a great tool for determining which startup programs you want to kill using msconfig). Once you have made your optimizations go to the Trace menu, and select the Optimize System item. This will cause the system to reboot and will then make some changes to the file structure on the hard drive (this includes a defragmentation of boot files and a shifting of their location to the fastest portion of the hard disk, as well as some other optimizations). After this is done, once again run a Trace analysis as above, except change the starting number to 3. Once the system has rebooted both times, compare the charts from the second trace to the charts for the fourth trace to show you the time improvement of the system's boot up.
The standard defragmenter included with Windows XP will not undo the boot optimizations performed by this application.
-----------------------------------
General Performance Tweaks
-----------------------------------
IRQ Priority Tweak
******************
[HKEY_LOCAL_MACHINE \ System \ CurrentControlSet \ Control \ PriorityControl]
You will need to create a new DWORD: IRQ#Priority (where # is the number of the IRQ you want to prioritize) and give it a setting of 1. This setting gives the requisite IRQ channel priority over the other IRQs on a software level. This can be extremely important for functions and hardware subsystems that need real-time access to other parts of the system. There are several different subsystems that might benefit from this tweak. Generally, I recommend giving either the System CMOS or the video card priority. The System CMOS generally has an IRQ setting of 8, and giving it priority enhances the I/O performance of the system. Giving priority to the video card can increase frame rates and make AGP more effective.
You can give several IRQs priority, but I am not entirely certain how the system interacts when several IRQs are given priority – it may cause random instabilities in the system, although it is more likely that there's a parsing system built into Windows XP to handle such an occurrence. Either way, I would not recommend it.
QoS tweak
*********
QoS (Quality of Service) is a networking subsystem which is supposed to insure that the network runs properly. The problem with the system is that it eats up 20% of the total bandwidth of any networking service on the computer (including your internet connection). If you are running XP Professional, you can disable the bandwidth quota reserved for the system using the Group Policy Editor [gpedit.msc].
You can run the group policy editor from the Run command line. To find the setting, expand "Local Computer Policy" and go to "Administrative Templates" under "Computer Configuration." Then find the "Network" branch and select "QoS Packet Scheduler." In the right hand box, double click on the "Limit Reservable Bandwidth." From within the Settings tab, enable the setting and then go into the "Bandwidth Limit %" and set it to 0%. The reason for this is that if you disable this setting, the computer defaults to 20%. This is true even when you aren't using QoS.
Free Idle Tasks Tweak
*********************
This tweak will free up processing time from any idle processes and allow it to be used by the foreground application. It is useful particularly if you are running a game or other 3D application. Create a new shortcut to "Rundll32.exe advapi32.dll,ProcessIdleTasks" and place it on your desktop. Double-click on it anytime you need all of your processing power, before opening the application.
Windows Indexing Services
Windows Indexing Services creates a searchable database that makes system searches for words and files progress much faster – however, it takes an enormous amount of hard drive space as well as a significant amount of extra CPU cycles to maintain the system. Most users will want to disable this service to release the resources for use by the system. To turn off indexing, open My Computer and right click on the drive on which you wish to disable the Indexing Service. Enter the drive's properties and under the general tab, untick the box for "Allow the Indexing Service to index this disk for fast file searching."
Priority Tweak
**************
[HKEY_LOCAL_MACHINE \ SYSTEM \ CurrentControlSet \ Control \ PriorityControl]
This setting effectively runs each instance of an application in its own process for significantly faster application performance and greater stability. This is extremely useful for users with stability problems, as it can isolate specific instances of a program so as not to bring down the entire application. And, it is particularly useful for users of Internet Explorer, for if a rogue web page crashes your browser window, it does not bring the other browser windows down with it. It has a similar effect on any software package where multiple instances might be running at once, such as Microsoft Word. The only problem is that this takes up significantly more memory, because such instances of a program cannot share information that is in active memory (many DLLs and such will have to be loaded into memory multiple times). Because of this, it is not recommended for anyone with less than 512 MB of RAM, unless they are running beta software (or have some other reason for needing the added stability).
There are two parts to this tweak. First is to optimize XP's priority control for the processes. Browse to HKEY_LOCAL_MACHINE \ SYSTEM \ CurrentControlSet \ Control \ PriorityControl and set the "Win32PrioritySeparation" DWORD to 38. Next, go into My Computer and under Tools, open the Folder Options menu. Select the View tab and check the "Launch folder windows in separate process" box. This setting actually forces each window into its own memory tread and gives it a separate process priority.
Powertweak application
**********************
xxx.powertweak.com
Powertweak is an application, which acts much like a driver for our chipsets. It optimizes the communication between the chipset and the CPU, and unlocks several "hidden" features of the chipset that can increase the speed of the system. Specifically, it tweaks the internal registers of the chipset and processor that the BIOS does not for better communication performance between subsystems. Supported CPUs and chipsets can see a significant increase in I/O bandwidth, increasing the speed of the entire system. Currently the application supports most popular CPUs and chipsets, although you will need to check the website for your specific processor/chipset combo – the programmer is working on integrating even more chipsets and CPUs into the software.
Offload Network Task Processing onto the Network Card
*****************************************************
[HKEY_LOCAL_MACHINE \ SYSTEM \ CurrentControlSet \ Services \ Tcpip \ Parameters]
Many newer network cards have the ability of taking some of the network processing load off of the processor and performing it right on the card (much like Hardware T&L on most new video cards). This can significantly lower the CPU processes needed to maintain a network connection, freeing up that processor time for other tasks. This does not work on all cards, and it can cause network connectivity problems on systems where the service is enabled but unsupported, so please check with your NIC manufacturer prior to enabling this tweak. Find the DWORD "DisableTaskOffload" and set the value to 0 (the default value is 1). If the key is not already available, create it.
Force XP to Unload DLLs
***********************
[HKEY_LOCAL_MACHINE \ SOFTWARE \ Microsoft \ Windows \ CurrentVersion \ Explorer]
"AlwaysUnloadDLL"=dword:00000001
XP has a bad habit of keeping dynamic link libraries that are no longer in use resident in memory. Not only do the DLLs use up precious memory space, but they also tend to cause stability problems in some systems. To force XP to unload any DLLs in memory when the application that called them is no longer in memory, browse to HKEY_LOCAL_MACHINE \ SOFTWARE \ Microsoft \ Windows \ CurrentVersion \ Explorer and find the DWORD "AlwaysUnloadDLL". You may need to create this key. Set the value to 1 to force the operating system to unload DLLs.
Give 16-bit apps their own separate processes
*********************************************
[HKEY_LOCAL_MACHINE \ SYSTEM \ CurrentControlSet \ Control \ WOW]
"DefaultSeparateVDM"="Yes"
By default, Windows XP will only open one 16-bit process and cram all 16-bit apps running on the system at a given time into that process. This simulates how MS-DOS based systems viewed systems and is necessary for some older applications that run together and share resources. However, most 16-bit applications work perfectly well by themselves and would benefit from the added performance and stability of their own dedicated resources. To force Windows XP to give each 16-bit application it's own resources, browse to HKEY_LOCAL_MACHINE \ SYSTEM \ CurrentControlSet \ Control \ WOW and find the String "DefaultSeparateVDM". If it is not there, you may need to create it. Set the value of this to Yes to give each 16-bit application its own process, and No to have the 16-bit application all run in the same memory space.
Disable User Tracking
*********************
[HKEY_CURRENT_USER \ Software \ Microsoft \ Windows \ CurrentVersion \ Policies \ Explorer]
"NoInstrumentation"=dword:00000001
The user tracking system built into Windows XP is useless to 99% of users (there are very few uses for the information collected other than for a very nosy system admin), and it uses up precious resources to boot, so it makes sense to disable this "feature" of Windows XP. To do so, browse to HKEY_CURRENT_USER \ Software \ Microsoft \ Windows \ CurrentVersion \ Policies \ Explorer and find the DWORD "NoInstrumentation". You may need to create this key if it is not there. The default setting is 0, but setting it to 1 will disable most of the user tracking features of the system.
Thumbnail Cache
***************
[HKEY_CURRENT_USER \ Software \ Microsoft \ Windows \ CurrentVersion \ Explorer \ Advanced]
"DisableThumbnailCache"=dword:00000001
Windows XP has a neat feature for graphic and video files that creates a "thumbnail" of the image or first frame of the video and makes it into an oversized icon for the file. There are two ways that Explorer can do this, it can create them fresh each time you access the folder or it can load them from a thumbnail cache. The thumbnail caches on systems with a large number of image and video files can become staggeringly large. To disable the Thumbnail Cache, browse to HKEY_CURRENT_USER \ Software \ Microsoft \ Windows \ CurrentVersion \ Explorer \ Advanced and find the DWORD "DisableThumbnailCache". You may need to create this key. A setting of 1 is recommended for systems where the number of graphic and video files is large, and a setting of 0 is recommended for systems not concerned about hard drive space, as loading the files from the cache is significantly quicker than creating them from scratch each time a folder is accessed.
YAhoo Messanger no ads
I went into the system registery and found out that Yahoo! moved the 'banner url' key to a slightly different location. Than what it used in version 5.5!
Yahoo! IM no longer uses 'YUrl', but uses 'View' instead. You gotta click on each key inside of 'View' and edit the 'banner url' string to anything you want... I simply cleared mine out completely and it works flawlessly!
Here is what you gotta do:
Run regedit
Goto HKEY_CURRENT_USER -> Software -> Yahoo -> Pager -> View
Inside the 'View' key there are a several other keys... go through each one and edit the 'banner url' string to your liking. It even works if the string is left blank (this causes it to look as if ads were never even implemented)!
Restart Yahoo! IM for the effect to take hold.
This is great for Yahoo! IM 5.6 users who don't want to be bothered with ads.
Your Home Page Nevr Being Changed
Your Home Page Nevr Being Changed
Some websites illegally modify your registry editor and set their website as default home page, for stop this,
1. Right-click on the Internet Explorer icon on your desktop and select "Properties".
2. In the "Target" box you will see "C:\Program Files\Internet
Explorer\IEXPLORE.EXE".
3. Now by adding the URL of the site to the end of this it overrides any
Homepage setting in internet options:
"C:\Program Files\Internet Explorer\IEXPLORE.EXE" http://drpctips.blogspot.com/
Your Own Home Server
Your Own Home Server - Introduction
An Introduction
In this tutorial you will learn how to step up your own server. This server will be comprised of Apache 1.3.5, PHP 4.2.0, and MySQL 3.23.49. This tutorial will address the basic setup of a server on your own computer. This means the removal of hassles of dealing with the company that is running a remote web server. It will be easy to modify. You can add any thing you want to it, be it CGI/Perl, Zope, Roxen, etc, all by your self. You will have unlimited disk space, well at least as big as your hard drive is =) Now that you know the advantages, it is time that I tell you what i used, and what you will need.
What I used
* Windows 2000 - NOTE that if you are using 2k you WILL NEED Administrative Privileges. If you don't then get them somehow =) If you are on 95, 98, NT, XP, ME, I* Apache 1.3.6 - I tried to use 2.0 but I could not get it work. I also feel that 1.3.6 is tried and true, so why mess with greatness.
* Mysql 3.23.49 - The newest version of MySQL when I set up my server. MySQL also the is the best PHP supported Database, and well love PHP don't we.
* PHP 4.2.1 - The latest and greatest PHP release. -nt
What you will need
* Apache 2 - Link: h**p://www.apache.org/dist/
* Mysql 3.23.49 - Link: h**p://www.mysql.com/downloads/mysql-3.23.html
* PHP 4.2.0 - Link: h**p://www.php.net/downloads.php
* Windows - This tutorial is ONLY written for new versions of Windows.
Once you have downloaded all the programs you are ready to continue.
1. Installing Apache
Installing Apache
The first step is to download Apache for Windows. Before you install it make sure that any other server software is removed. Remove it all via the control panel.On
Once you have clicked on the executable, a screen should com up that looks like this. Go ahead and click on next
user posted image
Of course you plan to abide be the license agreement, so click on I accept.... and click on next.
user posted image
You really don't need to read this, but if you want you can. Read it if you want feel informed. When you are ready click on next.
user posted image
Here is where the actual setup of Apache begins. For Network Domain put in localhost as for Server Name You want these both to be localhost because the server is running locally, on your computer. It doesn't matter what is in email field, just put in yours. No one will no it because it's just you.
user posted image
For the sake of this tutorial it is better to just leave it as it is because, later in the tutorial I will show you how to start the server with one click of the mouse, and for the sake of ease, it will be easier for you to follow along. You can change it if you want, but you will have to realize where to substitute it. For me the root drive is E: but for you will probably be C:
user posted image
Once you have all the jazz set up, it is time to install the server. If you are on w2k or XP be sure that you have Administrative permissions or you will get an error about half way through the install saving cannot access msvrt32.dll or something. If you get that error run it again when you have admin privileges. Once you are ready click on install.
user posted image
If all went well you just see a screen similar to this. Now it is time to test the install of apache. Click on Start > Program Files > Apache HTTP Server and look for start Start Apache in Console. Click it. Once it says Apache XXXXX running, press Windows Key + R and type -http://localhost/. If the install works you should see a page saying that it works. If all is set and done, continue to the next step.
user posted image
______________________________________________________________________
2. Installing PHP
Once you have clicked on the executable, a screen should come up that looks like this. Go ahead and click on next.user posted image
Of course you plan to abide be the license agreement, so click on I accept.... and click on next.
user posted image
For this information, we will want the simple standard install. Chances are you if you are reading this tutorial, you will probably not even want to talk about advanced =)
user posted image
This is the mail setup, just enter localhost, and me@localhost.com. These are not important, because you, the admin, are the only person that will use the server, and you will be the one handling errors.
user posted image
We are going to want this install to work is Apache, so click on Apache, and move on.
user posted image
Once you have all the jazz set up, it is time to install the server. If you are on w2k or XP be sure that you have Administrative permission or you will get an error about half way through the install saving cannot access msvrt32.dll or something. If you get that error run it again when you have admin privileges. Once you are ready click on install.
user posted image
After the install is done you should get something that says you will have to manually configure apache to use php. Assuming you have a working Apache server installed, make sure that it is not running. Navigate to C:\Program Files\Apache Group\Apache\conf\ open the httpd.conf file. Note that you can also get to the http.conf from the start menu. Start > Program File > Apache HTTP Server > Configure Apache Server > Edit the Apache httpd.conf Configuration File and the window will open up in notepad. Now hit Ctrl + End if you see something like what follows, you can skip this step. If you do not see that code, copy it. This code will only work if you used the default install folder when you installed php. If you did, copy that code and paste it into the end of the file. Select the code to right, and hit crtl + c , then go into the httpd.conf file and hit ctrl + v and save the file.
ScriptAlias /php/ "c:/php/"
AddType application/x-httpd-php .php .phtml
Action application/x-httpd-php "/php/php.exe"
Now that we have php installed, it is time to test it. Open up notepad and type the code to the right. Save it as phpinfo.php. Remember to set it as all files in the drop down menu, or the file will be a text file. Save in the Directory: C:\Program Files\Apache Group\Apache\htdocs. htdocs is the directory where all the files go. You can create endless dir's and browse them. For Example E:\Program Files\Apache Group\Apache\htdocs\mydir\myfile.php could be accessed as http://localhost/mydir/myfile.php. Once you have that file saved. You will need to start the Server. Click: Start > Program File > Apache HTTP Server >; and look for something like Start Apache in Console. After you have found it, launch it. You should get a window saying that Apache is running. Now go to Start > Run > and type in -http://localhost/phpinfo.php. If you don't see anything, php is not installed correctly. If php is installed correctly, you will see a few large tables, displaying php's configuration. Now Your are 1/2 done!
______________________________________________________________________
3. Installing MySQL
Once you have clicked on the executable, a screen should com up that looks like this. Go ahead and click on next.user posted image
Of course you plan to abide be the license agreement, so click on I accept.... and click on next.
Just like before you should leave the default dir alone, so you will be able to follow along with me when I show you how to start and stop all the aspects of the server.
Stay with the typical installation. Just like before, if you don't have admin privileges, the install will be faulty. After you click next, the install will begin. After the install has finished, move on to the next step.
Now you have to set up the root account. The root account is the absolute admin of the system, the highest possible. Click on Start > Run and type cmd to open up the command prompt. You are going to have to navigate to where MySQL is installed. Type C: > Enter > cd mysql > Enter > cd bin > Enter. Now you have to tell setup the root settings. Type mysqladmin -uroot password InsertYourPasswordHere then hit enter.
To see an image of the screen, -h**p://www.webmasterstop.com/tutorials/images/doscreen1.gif
What is the point of having a database if you can't easily administer it! That is where phpMyAdmin comes into play. phpMyAdmin is a free piece of software written in php that makes the administration of a mysql or many other types of databases easy. You will want to download (h**p://prdownloads.sourceforge.net/phpmyadmin/phpMyAdmin-2.2.6-php.zip?downloadrelease_id=85832)the latest version. Save it in the htdocs folder. Once it is done downloading it, right click on it and select Extract > To Here. When it is done you should end up with a directory in the htdocs folder called phpMyAdmin-2.2.6 To make it easier to access, rename it to phpMyAdmin. After you have renamed it, click on it and look for a file called config.inc Open it. This is where you set the configuration of phpMyAdmin. When you open it up, it should look similar to the image to your side. On yours there should be a few things missing. The $cfgPmaAbsoulteUrl and $cfgservers[$i]['password']. You will need to fill those in between the quotes. for the $cfgPmaAbsoulteUrl enter -http://localhost/phpMyAdmin/ if you followed my instructions to the letter. If you did not rename it or extracted to a different directory, put that in there. For the $cfgservers[$i]['password'] enter the password you entered when you were setting MySQL in the set above. You can refer to the image for help. After you have put the right things in save the file.
To see an image of the screen, -h**p://www.webmasterstop.com/tutorials/images/phpmyadminscreen1.gif
Now we want to test the install of mysql, php, phpmyadmin, and apache all at once. Start apache in console like we did before. Now, you are going to need to start mysql. For myself I made a file that would start mysql for me. Open notepad and type: start c:\mysql\bin\mysqld-nt.exe --standalone and save that as Start MySQL.bat. Once you have saved it, click it. A window should open and then close. Mysql is now running on your computer. After mysql and apache are started go to run again and type -http://localhost/phpMyAdmin/index.php and if everything is installed correctly phpmyadmin should so up. You are almost done! Now we have the easy part =)
4. Finishing it all up
Wow! We mad it through the whole process. Now we want to simplify the whole process of controlling the server. I made a toolbar with all the things I needed. I made a new folder on my desktop and called it Server Folder and put all the stuff there. I made a new shortcut and gave it a value of -http://localhost/ made a shortcut to the PHP Documentation page. Another shortcut to my php editor, which is now unavailable. The phpMyAdmin shortcut is set to -http://localhost/phpMyAdmin/index.php. I made another shortcut htdocs. I moved the Start Apache in Console program that was in the start menu folder and moved it to the server folder. You can take the Start Mysql file you made in the last page and move it to the new folder. After you have put all the desired things into that folder, right click on a blank space in stat menu task bar (where the program boxes lie) and select Toolbars > New Toolbar and navigate to the folder. Voila!
Now all you have to do is click Start Apache in Console , Start Mysql, and Lauch browser biggrin.gif
Here You Are Guys
Friday 12 February 2016
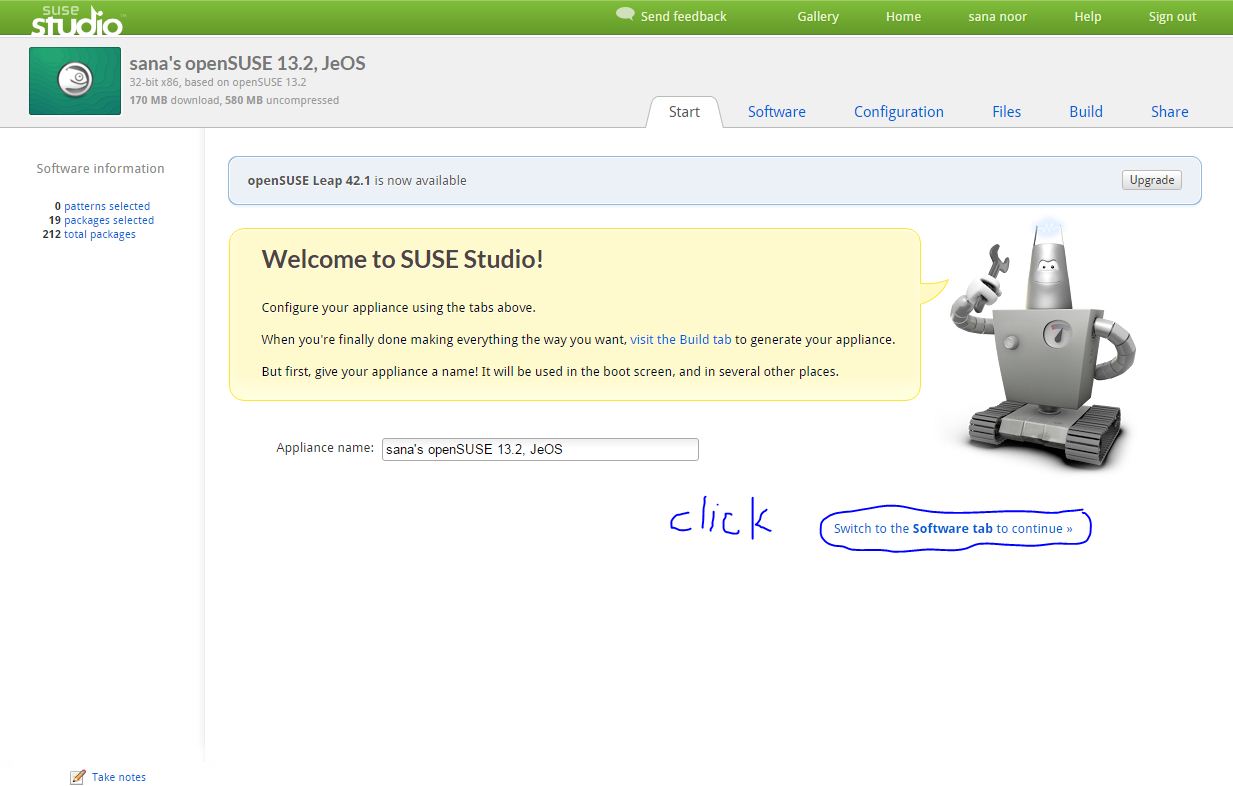
how to make your own windows
Today i am going to show you how to make your own windows in easy way.
First of all be ready for it and goto susestudio.com
You have to sign in and if you have account on other networks than you can also sign in with that accounts.


First of all be ready for it and goto susestudio.com
You have to sign in and if you have account on other networks than you can also sign in with that accounts.


Thursday 11 February 2016
Use your USB as a Ram
IF your Pc ram is Low here is trick to increase your Ram
.Right Click on My Computer>Properties. Advanced>Performance Settings . Advanced > Change Select the Usb Drive Click on Custom Size click oK
Now Restrat your Computer Check Ram Size
See Image


How to Know your pc is male or Female Funny trick
How to Know your pc is male or Female Funny trick :)
1.Open Note Pad type CreateObject("SAPI.SpVoice").Speak"http://drpctips.blogspot.com/"
2.Save your File As Gender.Vbs
3.Now run this File
if girl will Speak your pc is Female or male will speak your pc is Male
Remember (This Trick works only in Windows Xp)

Add shortcut keys to mycomputer
Add shortcut keys to my computer
Hello.
If you wanna add shortcuts to My computer.
follow steps
1.Click on star menu select Run
2.type%appdata%
3.click on Folder Microsoft>Windows>Network Shortcuts
4.Drag your Programs Icon and Software Icon Like vlc,Google Chrome,Avast.Autocad etc
See Image

Make Many folder at once
Make Many folder at once
1.Open notepad
2.if you want to make 10 folder type MD 1 2 3 4 5 6 7 8 9 10
3.Click on Save as type Folder.bat
4.Open Folder.bat
Restrart icon on your Desktop
Hello..
if you want to restrat your computer fast here is a solution to
folllow simple steps
1.right click on your Desktop
2.Select New then click on Shortcut
3.Type shutdown -r -t 00
4.now click on next
5.save your file as shutdown.exe
6.Click on shutdown.exe file when you want to restrat your computer


if you want to restrat your computer fast here is a solution to
make a restrat icon to your desktop to restrat your computer fast.
folllow simple steps
1.right click on your Desktop
2.Select New then click on Shortcut
3.Type shutdown -r -t 00
4.now click on next
5.save your file as shutdown.exe
6.Click on shutdown.exe file when you want to restrat your computer


Cmd Shortcut keys
CMD Shortcut keys
1. Accessibility Controls - access.cpl
2. Accessibility Wizard - accwiz
3. Add Hardware Wizard - hdwwiz.cpl
4. Add/Remove Programs - appwiz.cpl
5. Administrative Tools - control admintools
6. Automatic Updates - wuaucpl.cpl
7. Bluetooth Transfer Wizard - fsquirt
8. Calculator - calc
9. Certificate Manager - certmgr.msc
10. Character Map - charmap
11. Check Disk Utility - chkdsk
12. Clipboard Viewer - clipbrd
13. Command Prompt - cmd
14. Component Services - dcomcnfg
15. Computer Management - compmgmt.msc
16. Control Panel - control
17. Date and Time Properties - timedate.cpl
18. DDE Shares - ddeshare
19. Device Manager - devmgmt.msc
20. Direct X Troubleshooter - dxdiag
21. Disk Cleanup Utility - cleanmgr
22. Disk Defragment - dfrg.msc
23. Disk Management - diskmgmt.msc
24. Disk Partition Manager - diskpart
25. Display Properties - control desktop
26. Display Properties - desk.cpl
27. Dr. Watson System Troubleshooting Utility - drwtsn32
28. Driver Verifier Utility - verifier
29. Event Viewer - eventvwr.msc
30. Files and Settings Transfer Tool - migwiz
31. File Signature Verification Tool - sigverif
32. Findfast - findfast.cpl
33. Firefox - firefox
34. Folders Properties - control folders
35. Fonts - control fonts
36. Fonts Folder - fonts
37. Free Cell Card Game - freecell
38. Game Controllers - joy.cpl
39. Group Policy Editor (for xp professional) - gpedit.msc
40. Hearts Card Game - mshearts
41. Help and Support - helpctr
42. HyperTerminal - hypertrm
43. Iexpress Wizard - iexpress
44. Indexing Service - ciadv.msc
45. Internet Connection Wizard - icwconn1
46. Internet Explorer - iexplore
47. Internet Properties - inetcpl.cpl
48. Keyboard Properties - control keyboard
49. Local Security Settings - secpol.msc
50. Local Users and Groups - lusrmgr.msc
51. Logs You Out Of Windows - logoff
52. Malicious Software Removal Tool - mrt
53. Microsoft Chat - winchat
54. Microsoft Movie Maker - moviemk
55. Microsoft Paint - mspaint
56. Microsoft Syncronization Tool - mobsync
57. Minesweeper Game - winmine
58. Mouse Properties - control mouse
59. Mouse Properties - main.cpl
60. Netmeeting - conf
61. Network Connections - control netconnections
62. Network Connections - ncpa.cpl
63. Network Setup Wizard - netsetup.cpl
64. Notepad - notepad
65. Object Packager - packager
66. ODBC Data Source Administrator - odbccp32.cpl
67. On Screen Keyboard - osk
68. Outlook Express - msimn
69. Paint - pbrush
70. Password Properties - password.cpl
71. Performance Monitor - perfmon.msc
72. Performance Monitor - perfmon
73. Phone and Modem Options - telephon.cpl
74. Phone Dialer - dialer
75. Pinball Game - pinball
76. Power Configuration - powercfg.cpl
77. Printers and Faxes - control printers
78. Printers Folder - printers
79. Regional Settings - intl.cpl
80. Registry Editor - regedit
81. Registry Editor - regedit32
82. Remote Access Phonebook - rasphone
83. Remote Desktop - mstsc
84. Removable Storage - ntmsmgr.msc
85. Removable Storage Operator Requests - ntmsoprq.msc
86. Resultant Set of Policy (for xp professional) - rsop.msc
87. Scanners and Cameras - sticpl.cpl
88. Scheduled Tasks - control schedtasks
89. Security Center - wscui.cpl
90. Services - services.msc
91. Shared Folders - fsmgmt.msc
92. Shuts Down Windows - shutdown
93. Sounds and Audio - mmsys.cpl
94. Spider Solitare Card Game - spider
95. SQL Client Configuration - cliconfg
96. System Configuration Editor - sysedit
97. System Configuration Utility - msconfig
98. System Information - msinfo32
99. System Properties - sysdm.cpl
100. Task Manager - taskmgr
101. TCP Tester - tcptest
102. Telnet Client - telnet
103. User Account Management - nusrmgr.cpl
104. Utility Manager - utilman
105. Windows Address Book - wab
106. Windows Address Book Import Utility - wabmig
107. Windows Explorer - explorer
108. Windows Firewall - firewall.cpl
109. Windows Magnifier - magnify
110. Windows Management Infrastructure - wmimgmt.msc
111. Windows Media Player - wmplayer
112. Windows Messenger - msmsgs
113. Windows System Security Tool - syskey
114. Windows Update Launches - wupdmgr
115. Windows Version - winver
116. Wordpad - write
Subscribe to:
Posts (Atom)